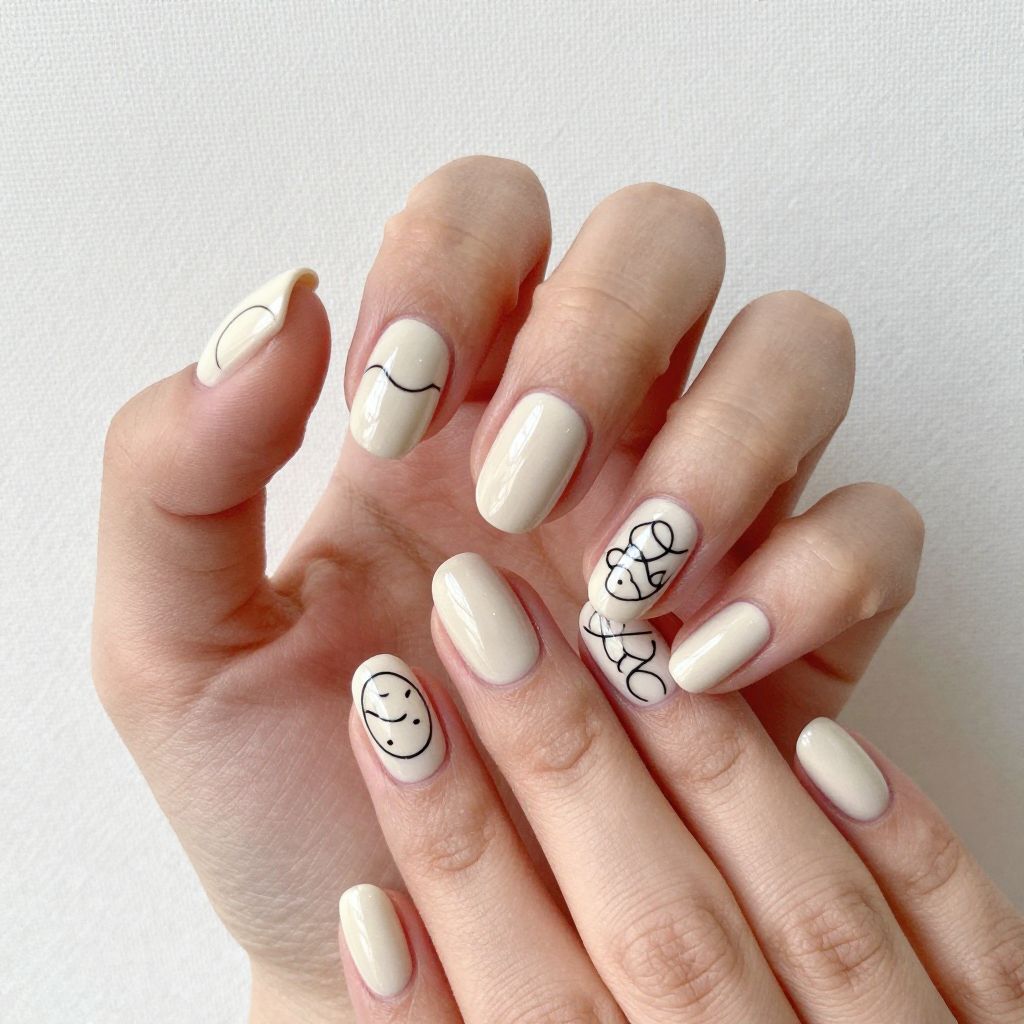
Spring arrives with fresh energy and vibrant color palettes that beg to be celebrated on your fingertips. Easter brings a perfect opportunity to embrace pastels, playful patterns, and designs that feel both cheerful and refined. Whether you prefer soft, romantic aesthetics or bold, artistic statements, these nail ideas will inspire your next salon visit or at home manicure session. Keep scrolling to discover designs that capture the essence of the season.
Easter nail art offers something for everyone, from minimalist elegance to intricate hand painted details. The beauty of spring themed nails lies in their versatility: you can wear them to brunch, to work, or to holiday celebrations without feeling out of place. Let’s explore fifteen stunning designs that showcase color, texture, and creativity in ways that feel fresh and utterly wearable.
Spring Easter Nail Designs
1. Soft Pastel Bunny Face Nails
These charming nails feature a light pink or cream base with adorable bunny faces painted on select nails using fine brushwork. The design includes tiny black dots for eyes, small pink noses, and delicate whisker details that bring personality to each nail. The remaining nails can showcase a solid pastel shade or subtle texture for balance.
The overall effect feels playful yet sophisticated, perfect for those who love character driven nail art without overwhelming the manicure. You can add small easter egg details on an accent nail to tie the theme together and create visual interest across the hand.
- Nail shape: Round or oval
- Base color: Soft pink, cream, or pale lavender
- Accent details: Bunny faces with whiskers, small eggs, or bow ties
- Finish: Matte or glossy with matte details
- Optional add ons: Rhinestone eyes or tiny gold accents
This design works beautifully for Easter brunches, family gatherings, or anyone who enjoys whimsical nail art that remains professional enough for everyday wear. The matte finish adds sophistication while the painted details keep things fun and seasonal. Maintenance is straightforward: simply avoid prolonged water exposure and reapply top coat weekly to preserve the painted details.
2. Marble Egg Easter Nails
Marble texturing takes center stage in this design, where each nail becomes a canvas for swirled patterns reminiscent of decorative easter eggs. Use soft pastel bases in blush pink, mint green, or pale yellow, then create intricate marble swirls using contrasting pastels or metallics. The technique involves dropping polish colors onto wet base and using a thin brush or toothpick to create organic, flowing patterns.
Each nail features unique marble patterns, making this design feel artful and entirely custom to your preferences. You can emphasize certain nails with metallic gold or silver veining to catch the light and add dimension. This approach celebrates the natural beauty of the marble technique while keeping the overall aesthetic springlike and elegant.
- Nail shape: Square or coffin
- Base color: Pastel pink, green, yellow, or lavender
- Accent details: Marble swirls in contrasting pastels or metallics
- Finish: High gloss or satin
- Optional add ons: Gold leaf or chrome accents
Marble egg nails suit both casual spring outings and more formal easter events, offering enough visual interest to feel special without appearing costume like. The technique works best when applied by a skilled nail technician, though confident home artists can attempt it with practice. Avoid heavy scrubbing when cleaning your hands to preserve the detailed marble work, and plan for biweekly maintenance appointments to keep the design fresh.
3. Gradient Pastel Ombre Nails
Gradient nails create a seamless color transition that feels modern and soothing all at once. This design features a gradient from soft blush to peachy nude, mint to lavender, or yellow to cream, applied across each nail individually. The sponge application method allows colors to blend beautifully, creating depth and visual softness that feels quintessentially spring.
You can coordinate the gradient across all ten nails in one direction or reverse the gradient on alternating nails for added visual interest. A glossy top coat enhances the seamless blend and creates a polished, salon quality finish. This minimalist approach appeals to those who love color without wanting bold patterns or heavy design elements.
- Nail shape: Oval, almond, or round
- Base color: Pastel in two to three complementary shades
- Accent details: Smooth color gradient applied with sponge
- Finish: High gloss
- Optional add ons: Subtle sparkle or nude glitter
Gradient ombre nails work beautifully in professional settings, casual daily wear, and special occasions, making them endlessly versatile for spring. The soft color transitions feel romantic and age appropriate for any nail enthusiast. Maintenance involves regular top coat application every five to seven days to maintain shine and protect the delicate color blending.
4. Floral Wildflower Pressed Nails
Bring spring gardens directly onto your nails with real or synthetic pressed flowers encased beneath a clear or milky base. Delicate wildflowers, baby’s breath, or tiny ferns are positioned on each nail before sealing with a thick layer of builder gel or clear polish. The result feels like wearable botanical art, capturing the essence of easter season flowers with understated elegance.
Choose a transparent or soft neutral base to allow the flowers to become the focal point while maintaining a refined appearance. The flowers catch the light subtly, creating dimension without requiring intricate hand painted details. This approach celebrates natural beauty and offers an eco conscious alternative when using sustainably sourced botanicals.
- Nail shape: Oval or coffin
- Base color: Clear, milky white, or pale nude
- Accent details: Real or synthetic pressed flowers and botanicals
- Finish: Glossy and smooth
- Optional add ons: Gold foil accents or subtle shimmer
Pressed flower nails make an unforgettable statement for easter celebrations, spring weddings, or anyone seeking botanical inspired nail art. The design requires professional application for proper sealing and longevity. Handle these nails gently and avoid excess water exposure, as moisture can compromise the flowers over time. Plan for salon visits every three weeks for maintenance and potential flower repositioning.
5. Speckled Confetti Easter Nails
Confetti nails bring playful joy to your fingertips through colorful paint specks scattered across a cream or white base. Apply tiny dots of pastel pink, mint, lavender, and butter yellow using a dotting tool or the end of a thin brush. The randomness of placement creates an organic, celebratory feel that captures easter spirit without being overly themed.
You can concentrate specks more heavily on accent nails or distribute them evenly across all ten fingers depending on your preference. A shiny top coat seals all the colors together, creating a cohesive, polished finish. This design feels fresh, approachable, and achievable for home artists with basic tools and steady hands.
- Nail shape: Square or round
- Base color: Cream, white, or soft nude
- Accent details: Pastel colored confetti dots scattered randomly
- Finish: Glossy
- Optional add ons: Holographic specks or iridescent flakes
Speckled confetti nails suit casual spring outings, family gatherings, and anyone who enjoys approachable, cheerful nail art. The design remains professional enough for most work environments while feeling celebratory. Maintenance is minimal: avoid direct contact with harsh chemicals and reapply top coat weekly to preserve the design integrity and shine.
6. Pastel French Tip Easter Twist
Update the classic french tip with gradient pastel bases and colorful nail tips to create a spring appropriate take on a timeless design. Instead of traditional white tips, use soft pink, mint, lavender, or peach tips on nails with matching or coordinating pastel bases. The contrast between base and tip should be subtle enough to feel refined rather than bold.
You can paint the tips in solid color or add delicate ombre blending where the tip color gradually becomes the base shade. This technique combines elegance with seasonal freshness, appealing to those who love classic designs with contemporary updates. The overall aesthetic feels polished and suitable for both professional and celebratory occasions.
- Nail shape: Oval or almond
- Base color: Soft pastel shade
- Accent details: Gradient or solid colored tips in complementary pastel
- Finish: Glossy and smooth
- Optional add ons: Gold striping or rhinestone accents at the tip line
Pastel french tip nails work for easter brunches, spring weddings, professional settings, and everyday wear. The design feels elevated yet approachable, making it popular among nail enthusiasts of all experience levels. Maintenance involves regular top coat application and careful attention to the tip area, where chipping most commonly occurs. Schedule salon visits every two to three weeks to maintain sharp tip lines and overall design appearance.
7. Glitter Gradient Bunny Ears Nails
Combine glitter gradients with cute bunny ear shapes on accent nails for a playful yet sophisticated easter design. Start with a soft pastel base like blush pink or lavender, then create a glitter gradient using fine cosmetic grade glitter suspended in builder gel. On two accent nails, add delicate white or nude bunny ear shapes using thin brush technique or nail stickers.
The bunny ears can feature pink inner ear details and tiny dot eyes for character without overwhelming the design. A high gloss finish over the entire manicure creates cohesion between the glitter gradient nails and the detailed bunny accent nails. This design appeals to those who love texture and playful elements with polish and restraint.
- Nail shape: Almond or coffin
- Base color: Soft pink, lavender, or pale peach
- Accent details: Fine glitter gradient and bunny ear designs
- Finish: Glossy
- Optional add ons: Rhinestone eyes or gold leaf accents
These nails work wonderfully for easter celebrations, spring events, and anyone seeking a balance between whimsy and sophistication. The glitter element adds glamour while the bunny theme keeps things festive. Maintenance requires avoiding rough textures and harsh chemicals. The glitter gradient holds up well with proper top coat application, lasting three to four weeks before needing refresh.
8. Negative Space Egg Nails
Negative space design lets your natural nail peek through in strategic areas, creating modern and minimalist easter nails. Paint pastel bases on most of the nail while leaving sections bare, then add thin lines or geometric shapes that form simple easter egg outlines. The contrast between color and bare nail creates visual interest without requiring complex artwork.
You can arrange egg shapes in a scattered pattern or position them symmetrically depending on your aesthetic preference. Use matte or glossy top coat to seal the design while maintaining the clean, modern appearance. This approach works especially well for those with shorter nails or those who prefer understated designs.
- Nail shape: Short to medium oval or round
- Base color: Soft pastel or white
- Accent details: Bare nail space arranged as egg outlines or patterns
- Finish: Matte or glossy
- Optional add ons: Thin gold or silver lines to define shapes
Negative space egg nails suit professional environments, casual spring outings, and anyone who appreciates minimalist design. The style feels modern and intentional rather than sparse. Maintenance is straightforward: these nails require only standard top coat reapplication and regular cleaning, making them low maintenance compared to heavily detailed designs.
9. Rainbow Pastel Tie Dye Nails
Tie dye techniques create organic, flowing color patterns that feel both artistic and springlike. Apply soft rainbow colors (blush, mint, lavender, peach, and pale yellow) in swirled patterns across each nail using water droplet or gel techniques. The colors blend naturally, creating one of a kind variations on each nail while maintaining a cohesive pastel aesthetic.
The tie dye effect feels playful yet refined when executed in pastels rather than bold primaries. A matte or satin top coat softens the effect and creates a velvety appearance. This design celebrates color and movement while remaining wearable for various occasions.
- Nail shape: Square or coffin
- Base color: White or cream
- Accent details: Pastel rainbow swirls in tie dye pattern
- Finish: Matte or satin
- Optional add ons: Fine glitter or pearl accents
Rainbow pastel tie dye nails work for spring festivals, casual gatherings, and anyone seeking colorful yet sophisticated nail art. The design requires confidence with water or gel blending techniques but offers stunning results. Maintenance involves careful handling during the first few days while the design fully sets. Plan for salon visits every three weeks to refresh and redraw faded areas.
10. Spring Garden Accent Nails
Feature detailed garden scenes on one or two accent nails while keeping remaining nails in solid pastel shades. Paint tiny flowers, grass, and butterflies on accent nails using thin brushes and steady hands. The garden scenes work best on the ring finger or pinky, where they become focal points without overwhelming the entire manicure.
Use soft greens for grass, pastels for flowers, and warm neutrals for soil or background elements. Keep details small and refined rather than attempting elaborate landscapes. A clear glossy top coat protects the artwork while maintaining a polished appearance.
- Nail shape: Oval or almond
- Base color: Pastel shade on most nails, white or cream on accent nails
- Accent details: Hand painted garden scenes with flowers and butterflies
- Finish: Glossy
- Optional add ons: Tiny rhinestones as flower centers
Spring garden accent nails suit easter celebrations, spring events, and anyone with appreciation for detailed nail art. This design requires professional application or significant artistic skill for home execution. Protect the detailed artwork by avoiding rough surfaces and heavy water exposure. Plan for salon maintenance every three weeks as fine details can fade with regular wear and exposure.
11. Pearlescent Spring Pastels
Pearlescent finishes create luminous, shimmering effects that catch light beautifully in spring sunshine. Apply pearlescent polish in soft pink, mint, lavender, or peach shades across all nails for a cohesive, glowing appearance. The subtle shimmer and color shifting quality of pearlescent finishes make nails appear sophisticated and multidimensional.
You can coordinate all ten nails in matching pearlescent shades or create a gradient using different pearlescent pastels. The luminous quality works particularly well outdoors, making this design perfect for spring activities. Pearlescent polishes require high quality products to achieve true dimensional color and avoid chalkiness.
- Nail shape: Oval, almond, or coffin
- Base color: Pearlescent pastel in coordinated shades
- Accent details: Subtle shimmer and iridescent effects
- Finish: Glossy with luminous quality
- Optional add ons: Fine glitter accent nails or metallic details
Pearlescent spring pastels work beautifully for casual spring outings, professional settings, and anyone seeking understated glamour. The shimmering quality feels special without being over the top. Maintenance requires regular top coat application to preserve the luminous effect. These nails typically last three weeks before needing polish refresh or removal.
12. Minimalist Easter Egg Line Art Nails
Simple line art creates elegant easter egg designs using thin black or deep purple lines on white or cream bases. Draw egg outlines with minimal decorative lines inside using thin nail art brushes or fine point markers. The minimalist approach emphasizes clean design and precision over elaborate details.
Position eggs in strategic locations on different nails to create visual interest across the hand. You can add delicate dot patterns inside eggs or simple geometric details without overcomplicating the design. A glossy clear top coat finishes the look with polish and protection.
- Nail shape: Round or square
- Base color: White, cream, or soft nude
- Accent details: Thin line art egg designs with minimal decoration
- Finish: Glossy
- Optional add ons: Gold accents or subtle background color
Minimalist egg nails suit professional environments, minimalist style enthusiasts, and anyone preferring understated spring designs. The clean line work feels contemporary and artistic. Maintenance involves avoiding heavy contact with rough surfaces that might chip the lines. These nails typically last three weeks, making them a reliable choice for those wanting a simple easter aesthetic.
13. Soft Ombre Bunny Silhouette Nails
Combine ombre gradients with adorable bunny silhouettes in a design that balances cuteness with sophistication. Create soft color gradients from one pastel to another, then add tiny black or deep color bunny silhouettes positioned along the gradient. The contrast between soft background colors and dark silhouettes creates visual definition.
Position bunnies at different heights across nails to create dynamic composition. You can add small details like cottontail puffs using white polish for added charm. The glossy finish brings the entire design together cohesively.
- Nail shape: Almond or coffin
- Base color: Pastel ombre gradient
- Accent details: Bunny silhouettes and cottontail details
- Finish: Glossy
- Optional add ons: Rhinestones or gold accents
These nails work wonderfully for easter celebrations, spring events, and anyone seeking playful yet polished nail art. The design requires moderate artistic skill but rewards effort with stunning results. Maintenance involves careful handling and regular top coat application. Plan for salon visits every three weeks to maintain gradient definition and silhouette clarity.
14. Holographic Easter Sparkle Nails
Holographic finishes create rainbow prismatic effects that feel magical and celebratory. Apply holographic gel polish or chrome powders over soft pastel bases to create intense color shifting and sparkle. The holographic effect becomes more dramatic in sunlight, making these nails perfect for outdoor easter celebrations.
You can keep holographic effects on all nails or reserve them for accent nails paired with solid pastels. The high shine finish requires careful application and curing to achieve optimal sparkle and dimension. This design appeals to those seeking glamorous, statement making easter nails.
- Nail shape: Coffin or square
- Base color: Soft pastel under holographic effect
- Accent details: Holographic chrome powder or gel for rainbow shimmer
- Finish: High gloss with holographic effect
- Optional add ons: Glitter accents or rhinestone details
Holographic easter sparkle nails make bold statements for celebrations, parties, and anyone desiring dramatic, eye catching nail art. These nails require professional application using quality holographic products for best results. Handle these nails gently to preserve the delicate sparkle effect. Salon maintenance appointments every three weeks help restore sparkle and address any wear.
15. Soft Nude Easter Geometry Nails
Geometric patterns in pastel shades create modern, artistic designs without overwhelming the hand. Use soft nude or cream base colors, then add subtle geometric shapes in complementary pastels. Create triangles, circles, or abstract patterns that maintain clean lines and balanced composition.
You can keep geometry minimal and focused on one or two accent nails or distribute patterns across all fingers. The matte finish adds sophistication while geometric elements keep the design feeling contemporary. This approach works beautifully for those preferring subtle spring nails over obvious holiday themes.
- Nail shape: Oval or square
- Base color: Soft nude, cream, or pale taupe
- Accent details: Geometric shapes in pastel colors
- Finish: Matte
- Optional add ons: Gold striping or negative space elements
Soft nude easter geometry nails suit professional settings, minimalist aesthetics, and anyone seeking sophisticated spring designs. The geometric patterns feel intentional and artistic while remaining understated. Maintenance involves regular cleaning and weekly top coat application. These nails typically last three to four weeks before needing refresh, making them reliable for consistent wear.
Frequently Asked Questions
How Long Do Easter Nail Designs Typically Last?
Most easter nail designs last between two to four weeks depending on application method, polish quality, and nail care practices. Gel polish designs generally outlast traditional lacquer, lasting up to four weeks with proper sealing and top coat maintenance. Designs featuring hand painted details may require touch ups after two to three weeks as fine lines and artwork naturally fade with daily exposure and hand washing.
To extend longevity, avoid prolonged water exposure, wear gloves during cleaning tasks, and reapply top coat every five to seven days. Nail growth will eventually expose bare nail at the base, requiring removal or growth out depending on your preference. Most nail enthusiasts schedule salon appointments every three weeks for maintenance and design refresh.
Can I Create Easter Nail Designs at Home Without Professional Experience?
Absolutely! Many easter designs like gradients, speckled confetti, and solid pastels are entirely achievable for home artists with basic supplies and practice. Designs requiring less precision, such as tie dye patterns, tie dye effects, and glitter application, offer forgiving results even for beginners. Starting with simple designs and investing in quality tools like thin brushes and dotting implements helps build skills progressively.
More complex designs featuring detailed artwork, marble effects, or negative space require confidence with techniques but become manageable with practice and patience. Watching tutorials, practicing on nail wheels first, and using nail guides significantly improves results. For your first attempt, consider starting with simple solid pastels or gradient designs before progressing to more intricate artwork.
What Nail Shape Works Best for Easter Designs?
Nail shape preference comes down to personal style and the specific design you’re creating. Oval and round shapes offer classic versatility and work well for nearly all easter designs. Almond and coffin shapes provide elegant canvases for detailed artwork and showcase designs beautifully with their elongated proportions.
Square nails work wonderfully for geometric designs and provide maximum surface area for detailed painting. Shorter nails suit minimalist designs, negative space concepts, and anyone preferring practical everyday wear. The best shape is ultimately the one that makes you feel confident and comfortable. Consider your lifestyle, work environment, and design complexity when selecting your ideal nail shape.
How Do I Keep Pastel Easter Nails Looking Fresh Throughout the Season?
Regular maintenance is key to keeping easter nails looking their best throughout spring. Apply top coat every five to seven days to refresh shine and protect designs from daily wear and water exposure. File nails gently along the edges only, avoiding excessive buffing that weakens the polish application. Avoid using nails as tools, as this causes breakage and chips that compromise design integrity.
Schedule salon touch ups every three weeks to address growth, chips, and color fade. Protect intricate designs by avoiding harsh chemicals, wearing gloves while cleaning, and minimizing prolonged water contact. If designs begin fading or chipping before three weeks, requesting earlier appointments helps maintain aesthetics. Consider designs using durable finishes like builder gel or dip powder if you struggle with maintaining delicate lacquer designs.
Are Easter Nail Designs Appropriate for Professional Work Environments?
Most subtle easter designs work beautifully in professional settings without appearing costume like or inappropriate. Soft pastel gradients, pearlescent finishes, minimal accent nails, and elegant french tips feel polished and professional while celebrating the season. Designs with modest Easter themes, such as simple egg outlines or understated bunny accents, typically fit professional standards.
More elaborate designs featuring bright colors, heavy glitter, or obvious holiday imagery may feel less appropriate depending on your workplace culture. Consider your specific industry and office environment when selecting designs. When unsure, opting for subtle approaches ensures aesthetic appeal while maintaining professional appropriateness. Many workplaces embrace seasonal nail art as long as designs remain tasteful and not overly distracting.
What Products Work Best for Creating Easter Nail Designs?
Quality gel polish, acrylics, and traditional lacquer all work beautifully for easter designs depending on your preferred application method and durability needs. Gel polish offers excellent color payoff, durability, and superior finishes for detailed artwork, making it ideal for intricate designs. Traditional polish works wonderfully for simple designs and allows quick changes if you want variety throughout spring.
Investing in quality base coats, top coats, and colored polishes significantly improves results and longevity. Specialized products like builder gels, glitter suspensions, and metallic finishes expand creative possibilities. Using products from reputable brands ensures better color accuracy, durability, and safer application. Consulting with nail professionals about product recommendations helps you select options suited to your specific design preferences and skill level.
Should I Remove Easter Nails Before Moving to Summer Designs?
You can transition directly to summer designs without removing previous nails, though the transition works most smoothly with fresh manicures. If your easter design uses pastel colors that coordinate with summer aesthetics, gentle buffing of previous designs followed by new base coats allows seamless transitions. However, starting completely fresh with nail removal ensures optimal color accuracy and design clarity for new summer themes.
Professional removal at salons prevents damage to natural nails compared to at home removal with acetone. Allow your natural nails a brief recovery period of a few days after removal before applying new designs. Many nail enthusiasts enjoy taking breaks between seasonal designs to let nails breathe and naturally strengthen. Whether you transition directly or start fresh, avoiding harsh removal methods protects nail health.
Final Thoughts
Easter and spring nail designs offer wonderful opportunities to celebrate the season through color, texture, and creativity. Whether you prefer soft pastels, playful characters, artistic details, or sophisticated minimalism, these fifteen designs showcase the incredible versatility of spring themed nail art. Each design can be customized to match your personal style, lifestyle needs, and creative comfort level, ensuring you find options that feel authentically you.
Experimenting with different designs throughout spring keeps your nails feeling fresh and seasonal while allowing you to discover what resonates with your aesthetic. Don’t hesitate to ask your nail technician about adaptations or combinations that blend multiple design elements together. The beauty of easter and spring nail art lies in its endless creative possibilities and the joy it brings to your everyday appearance.
If you found these designs inspiring, explore our collection of cute Easter nail ideas and cute spring nail ideas for even more seasonal inspiration. Your next manicure awaits, ready to celebrate everything beautiful about the season ahead.